Have you ever dreamed of waking up to birdsong instead of traffic noise, or looking out your window at forest views rather than suburban sprawl? Off-grid living is more than just a fantasy—it’s becoming a viable lifestyle choice for thousands of Americans seeking independence, sustainability, and connection with nature. And at the heart of making this dream possible? Solar power.
I remember the first time I flipped a switch in my remote cabin and watched the lights come on—powered entirely by the sun. That moment of energy independence felt revolutionary. Whether you’re setting up a hunting cabin, a weekend retreat, or your permanent off-grid home, harnessing solar energy is increasingly affordable and, yes, something you can absolutely do yourself with the right preparation.
The beauty of DIY solar is that it puts the power (quite literally) in your hands. No more utility bills, no more reliance on the grid, and no more worrying about power outages affecting your comfort and safety. Instead, you’re creating a self-sufficient energy system tailored to your specific needs.
Ready to embark on your solar journey? Let’s dive into everything you need to know to bring clean, renewable energy to your off-grid paradise.
How Much Power Do You Really Need?
Before you start shopping for panels or batteries, you need to answer one fundamental question: how much power will your cabin actually use? Many first-time solar enthusiasts make the mistake of either drastically over-engineering their system (wasting money) or underestimating their needs (leading to frustration).
Think about what you’ll actually be powering. Most off-grid cabins need electricity for:
- Lighting (LED lights use surprisingly little power)
- Fans or small heating elements
- Electronic devices (phones, laptops, tablets)
- Small appliances (coffee maker, blender)
- Refrigeration (often the biggest power consumer)
- Water pumps (if you have running water)
To calculate your daily usage, make a list of every device you’ll use, noting its wattage and estimated hours of operation per day. For example:
- Five 10W LED lights running 5 hours daily = 250 watt-hours
- Laptop (45W) used 4 hours = 180 watt-hours
- Small refrigerator (60W running continuously) = 1,440 watt-hours
- Phone charging (10W for 2 hours) = 20 watt-hours
Adding these up gives you approximately 1,890 watt-hours or 1.89 kilowatt-hours (kWh) daily. Now here’s the crucial part—you need to account for seasonality. Solar panels produce significantly less power during winter months due to shorter days and the sun’s lower angle in the sky. As a rule of thumb, design your system to handle winter conditions, which might mean doubling your summer capacity requirements.
You’ll also need to factor in several days of autonomy—how long you need your battery bank to sustain you during cloudy periods. For most cabin users, 3-5 days is reasonable, but if you’re in an area with frequent overcast weather, you might want to plan for more.
Basic System Components
A DIY solar setup consists of five essential components, each playing a vital role in converting sunlight into usable electricity for your cabin:
Solar Panels
These are your energy collectors—the workhorses that convert sunlight into direct current (DC) electricity. Panels come in different wattages, typically ranging from 100W to 400W each for residential systems. Monocrystalline panels are more efficient and work better in partial shade but cost more, while polycrystalline panels offer better value if you have plenty of full-sun placement options.
For perspective, a 300W panel in full sun will produce about 1,200-1,500 watt-hours daily in summer (less in winter). For our example 1.89kWh daily usage, you’d theoretically need just two good-sized panels for summer use, but realistically 4-6 panels to account for winter and cloudy days.
Charge Controller
Think of this as the brain of your system. The charge controller regulates the voltage and current coming from your solar panels and going to your battery. This prevents overcharging and extends battery life. There are two main types:
- PWM (Pulse Width Modulation): Cheaper, simpler, but less efficient
- MPPT (Maximum Power Point Tracking): More expensive but can increase energy harvest by 15-30%
For cabin systems, the extra efficiency of MPPT controllers usually justifies their higher price, especially in limited-space installations where maximizing energy from each panel matters.
Battery Bank
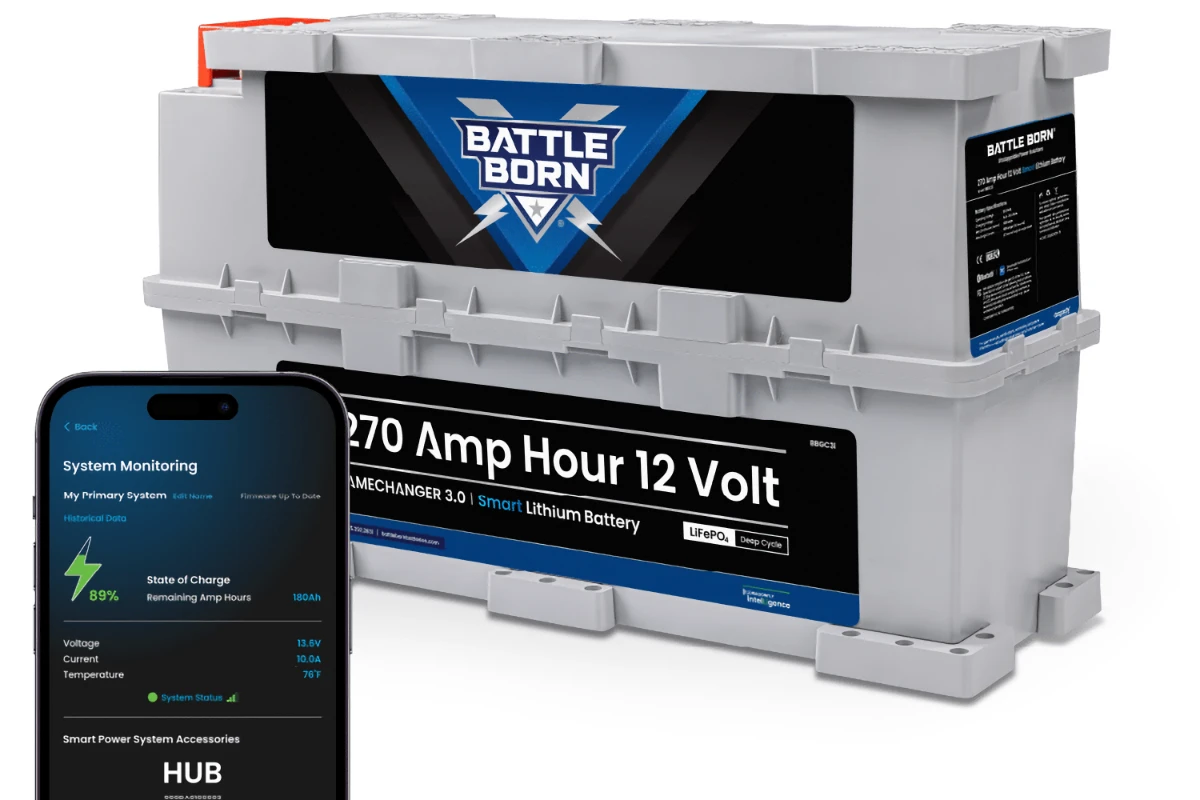
Batteries store the energy your panels collect during daylight hours so you can use electricity anytime. Deep-cycle lead-acid batteries have been the traditional choice, but Lithium Iron Phosphate (LiFePO4) batteries are quickly becoming the gold standard for off-grid systems despite their higher upfront cost.
Why? LiFePO4 batteries can be discharged to 80-90% capacity (compared to 50% for lead-acid), last 3-4 times longer, weigh less, and require zero maintenance. For a cabin system needing to store 5kWh, you might use four 12V 100Ah LiFePO4 batteries or eight 6V 220Ah lead-acid batteries. I’d recommend Battle Born LiFePO4 batteries, they’re well-reviewed, made in the USA, and built specifically for off-grid applications like cabins, RVs, and tiny homes.
Inverter
This device converts the DC power stored in your batteries into the alternating current (AC) power that most household appliances use. Inverters come in two main varieties:
- Modified sine wave: Less expensive but may cause problems with sensitive electronics
- Pure sine wave: Produces clean power identical to grid electricity
For cabin use, I strongly recommend pure sine wave inverters. They’re worth the extra cost to avoid potential issues with electronics, refrigerators, and power tools.
Mounting System
Whether you’re installing panels on your cabin roof or a ground-mounted rack, you’ll need a sturdy mounting system that can withstand weather extremes. Roof mounts save space but make panels harder to clean and adjust. Ground mounts allow for optimal positioning and easier maintenance but require more space and materials.
Prebuilt Kits vs Custom Builds
When it comes to assembling your solar system, you essentially have three paths forward: prebuilt all-in-one systems, component kits, or fully custom builds.
All-in-One Systems
Products like the EcoFlow Power Kits or Bluetti AC300 bundle everything together in user-friendly packages. These systems integrate panels, batteries, and inverters with simple connections and smartphone apps for monitoring.
Pros:
- Easiest installation for beginners
- Components are guaranteed compatible
- Usually include monitoring systems
- Single warranty covers everything
Cons:
- Significantly more expensive per watt
- Limited expandability
- Proprietary components can be costly to replace
- Less customization for specific needs
These are ideal if you want the simplest possible installation and don’t mind paying a premium for convenience.
Component Kits
Retailers like Renogy and WindyNation offer bundled components designed to work together but requiring more assembly. Harbor Freight also sells budget kits that can work for very small systems.
Pros:
- Better value than all-in-ones
- Basic compatibility is ensured
- Often more expandable
- Middle ground on complexity
Cons:
- Still more expensive than sourcing parts individually
- Quality varies widely (especially with budget kits)
- May still require additional components
These kits make sense for beginners who want some customization options without starting completely from scratch.
Custom Builds
Sourcing individual components separately gives you complete control over every aspect of your system.
Pros:
- Maximum value per watt
- Complete customization
- Can select top-quality components where it matters most
- Easiest to expand incrementally as budget allows
Cons:
- Requires the most research and knowledge
- Must ensure component compatibility
- May require sourcing from multiple vendors
- More complex installation
I personally recommend the custom approach for anyone comfortable with basic electrical concepts. The knowledge you gain will prove invaluable for maintaining and troubleshooting your system over time.

Cost Breakdown (1kW to 3kW systems)
Let’s talk dollars and cents. Solar has never been more affordable, but it still represents a significant investment. Here’s what you can expect to pay for different system sizes:
1kW System (Suitable for minimal cabin use)
- Solar Panels: $400-$600 (4 x 250W panels)
- Charge Controller: $100-$250 (depending on type)
- Batteries: $800-$1,200 (budget lead-acid) or $1,500-$2,000 (LiFePO4)
- Inverter: $200-$400 (1500W pure sine wave)
- Mounting Hardware: $200-$300
- Cables, Connectors, Safety Gear: $150-$250
Total: $1,850-$3,000 (budget option) or $2,550-$3,800 (premium option)
2kW System (Comfortable cabin living)
- Solar Panels: $800-$1,200 (8 x 250W panels)
- Charge Controller: $200-$400
- Batteries: $1,600-$2,400 (budget lead-acid) or $3,000-$4,000 (LiFePO4)
- Inverter: $400-$600 (2000-3000W pure sine wave)
- Mounting Hardware: $300-$500
- Cables, Connectors, Safety Gear: $200-$350
Total: $3,500-$5,450 (budget option) or $4,900-$7,050 (premium option)
3kW System (Small home comfort)
- Solar Panels: $1,200-$1,800 (12 x 250W panels)
- Charge Controller: $300-$500
- Batteries: $2,400-$3,600 (budget lead-acid) or $4,500-$6,000 (LiFePO4)
- Inverter: $600-$900 (3000-4000W pure sine wave)
- Mounting Hardware: $400-$700
- Cables, Connectors, Safety Gear: $300-$450
Total: $5,200-$7,950 (budget option) or $7,300-$10,350 (premium option)
The most significant cost variable is battery storage. While LiFePO4 batteries cost 2-3 times more upfront than lead-acid alternatives, their longer lifespan (10+ years vs. 3-5 years), deeper discharge capability, and zero maintenance requirements make them substantially cheaper over the system’s lifetime.
My advice? If you can possibly stretch your budget, invest in quality batteries and a good MPPT charge controller. These two components will have the biggest impact on your system’s performance and longevity.
Location and Setup Tips
The effectiveness of your solar system depends enormously on proper placement and installation. These factors can easily double your energy production if done right—or cut it in half if done poorly.
Panel Placement
In the Northern Hemisphere, solar panels should face true south (not magnetic south). The optimal tilt angle equals your latitude in degrees, though adjusting seasonally (steeper in winter, flatter in summer) can increase annual production by 25-30% if you’re willing to make the adjustments.
Use smartphone apps like “Sun Surveyor” to identify potential shading issues throughout the day and year. Remember that even partial shading of a single panel can dramatically reduce the output of an entire array.
Mounting Options
Roof Mounts:
- Use existing structure (no additional footprint)
- Generally more secure against extreme weather
- Harder to access for cleaning and maintenance
- Often hotter, reducing panel efficiency
Ground Mounts:
- Easier to optimize angle and orientation
- Better airflow keeps panels cooler and more efficient
- Easier to clean and maintain
- Requires more space and materials
- May need to clear vegetation or trees
Pole Mounts:
- Can be adjusted for season (manually or automatically)
- Excellent airflow
- Smallest footprint
- Most expensive per panel
- Best for limited space situations
For most cabins, ground mounts offer the best combination of performance, cost, and ease of installation. If space is limited, roof mounting is perfectly acceptable as long as your roof faces within 45° of true south.
Wiring Considerations
Voltage drop becomes significant in longer cable runs. For every 100 feet of distance between your panels and batteries, you lose roughly 2–5% of your power. This isn’t just about efficiency—it can become a safety issue if your wiring isn’t sized correctly. The National Electrical Code (NEC 2023) offers specific guidance on voltage drop, conductor sizing, and overcurrent protection for both off-grid and grid-connected solar systems.
- Place batteries as close to panels as safely possible
- Use appropriately sized wire (thicker for longer runs)
- Consider higher voltage systems (24V or 48V instead of 12V) for longer distances
- Install the charge controller near the batteries, not near the panels
Always use proper MC4 connectors for panel connections and heavy-duty battery cables for the battery bank. Cheap connectors are a common point of failure in DIY systems.
Taking the Plunge into Energy Independence
There’s something profoundly satisfying about producing your own power. Every time I visit my solar-powered cabin, I feel a deep connection to the natural cycles of the day—waking with the sun, being mindful of energy use, and appreciating each kilowatt-hour in a way that grid-connected living never inspired.
DIY solar isn’t just about saving money or being environmentally friendly (though it accomplishes both). It’s about reclaiming a measure of self-reliance that many of us have lost in our interconnected world. When you understand how to harness the sun’s energy, store it effectively, and power your life with it, you’ve mastered a fundamental skill that transforms your relationship with the modern world.
Start small if you need to—perhaps a simple system just for lighting and device charging. As your confidence grows, you can expand incrementally. Each addition will teach you something valuable about energy production and consumption, creating a feedback loop of awareness that typically leads to more efficient usage patterns.
The journey toward off-grid living isn’t always smooth, but those challenges become part of the adventure. And when you’re sitting on your cabin porch as the sunset paints the sky, knowing that you’ll have lights, refrigeration, and comfort long after darkness falls—all powered by that same sun—you’ll know the effort was worthwhile.
Ready to make the leap to solar self-sufficiency? Your cabin in the woods (or mountains, or desert) is waiting to become not just a getaway, but a showcase for sustainable, independent living.
Frequently Asked Questions
How long will a DIY solar system last? The panels themselves typically last 25-30 years, though they’ll gradually produce slightly less power (about 0.5-0.8% less each year). Inverters generally last 10-15 years, while battery lifespan varies dramatically: 3-5 years for lead-acid batteries with proper care, or 10+ years for quality LiFePO4 batteries. With component replacements as needed, your overall system can function indefinitely.
Can I install solar if my cabin is in a heavily wooded area? Yes, but you’ll need to be strategic. Even partial shade significantly reduces panel output. Consider a ground mount in a clearing, trimming select branches that cause shading, or accepting that you’ll need more panels to compensate for reduced sunlight. Some people even run cables to a sunny clearing away from their cabin for maximum production.
What about snow? Do I need to clear my panels in winter? While some snow will slide off tilted panels, heavy accumulation needs removal to restore production. Use a soft snow brush on an extension pole—never metal tools that could scratch the panel surface. In snowy regions, ground mounts make panel clearing much easier and safer than roof installations.
Can I run air conditioning on a DIY solar system? Yes, but it requires significant capacity. Even small window units draw 500-900 watts while running, which adds up quickly. For occasional AC use, plan at least a 3kW system with substantial battery storage. For regular cooling, consider alternative methods like increased insulation, thermal mass, and passive cooling techniques to reduce the load.
Is it legal to disconnect from the grid completely? This varies by location. Some jurisdictions require habitable dwellings to maintain grid connection or meet specific inspection requirements for off-grid systems. Check local building codes and speak with your county building department before proceeding. Many remote areas have fewer restrictions, which is one reason they’re popular for off-grid living.
